
In this comprehensive guide, we will explore the art of groove extraction in Ableton Live, one of the most versatile and popular digital audio workstations (DAWs) used by musicians, producers, and sound designers worldwide. Groove extraction is a powerful technique that allows you to capture the unique rhythmic feel from one audio source and apply it to another, enhancing the overall groove and flow of your music productions. Whether you’re a seasoned Ableton user or just starting your music production journey, mastering groove extraction can take your tracks to new heights, adding a professional touch that stands out among others. In this tutorial, we will delve into the process step-by-step, helping you outrank other websites with your newfound expertise in groove extraction.
Understanding Groove Extraction
Before diving into the process of groove extraction, let’s gain a solid understanding of what it entails. Groove extraction involves analyzing the timing and dynamics of a reference audio clip, typically a drum loop or a percussion pattern, to create a groove template. This template can then be applied to other audio or MIDI clips, aligning their rhythm and giving them a similar feel to the original reference.
The Process of Groove Extraction
1. Selecting the Reference Clip
The first step in groove extraction is choosing a reference audio clip with a groove that resonates with the vibe you want to achieve in your project. It could be a funky drum break, a snappy hi-hat pattern, or any other rhythm that inspires you.
2. Preparing the Reference Clip
Before extracting the groove, it’s crucial to ensure that the reference clip is properly trimmed and looped. In Ableton Live, you can set the clip’s start and end points to create a seamless loop that represents the groove accurately.
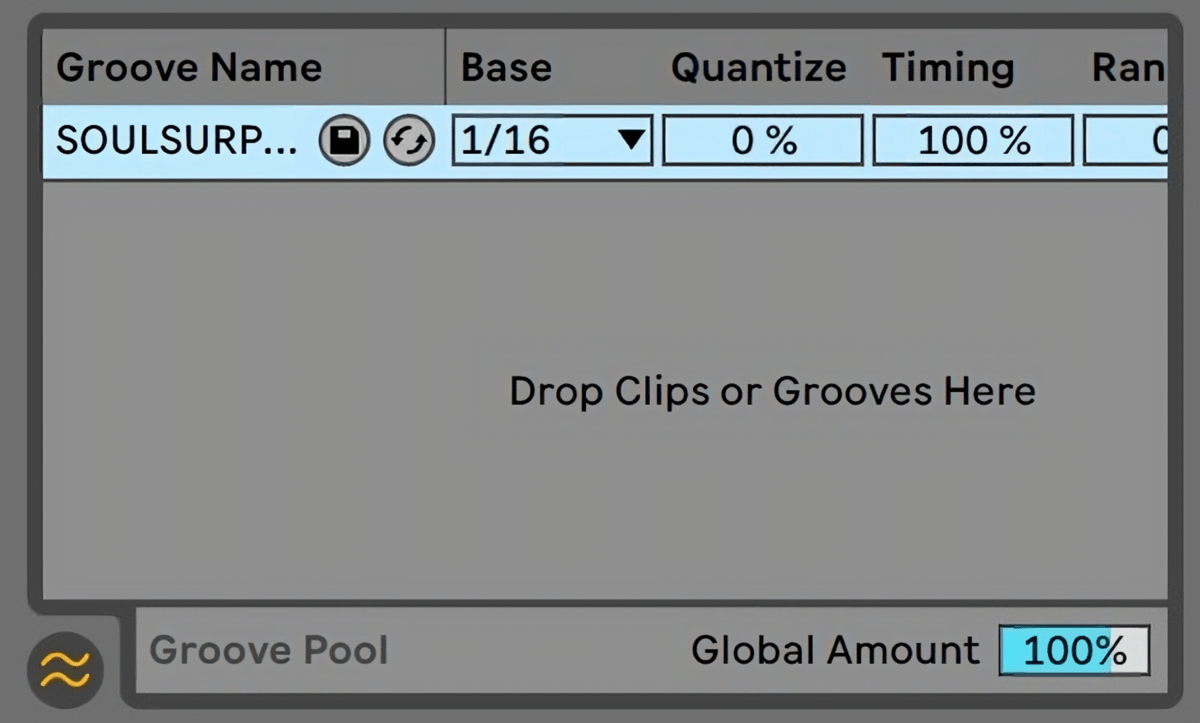
3. Opening the Groove Pool
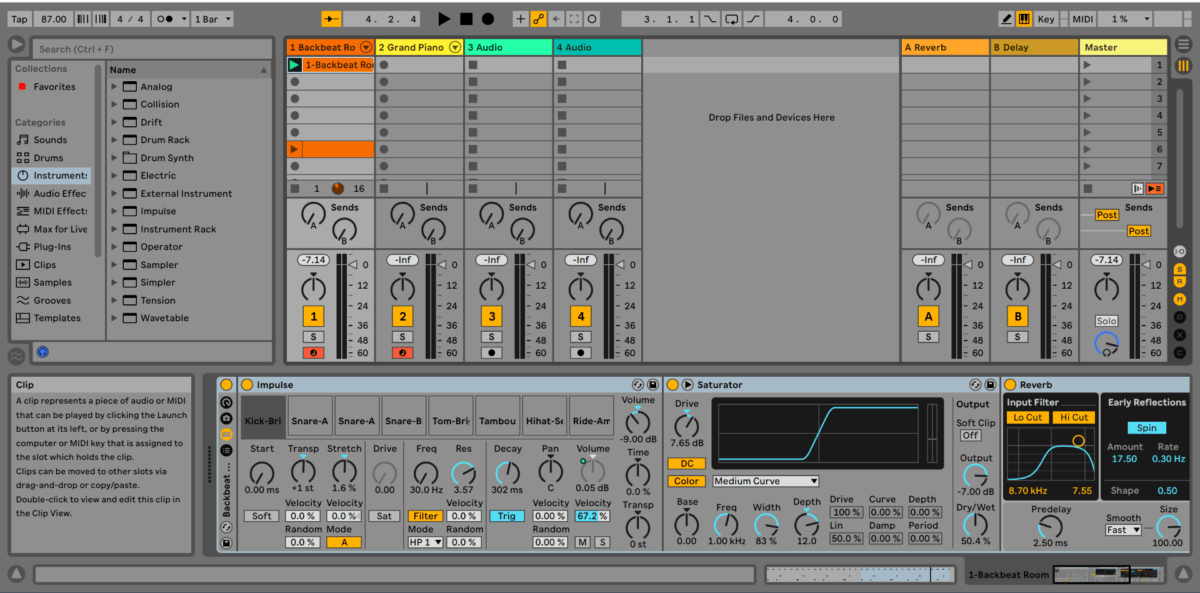
Ableton Live’s Groove Pool is where the magic of groove extraction happens. Open the Groove Pool by clicking on the small ‘G’ button in the Clip View or by navigating to the “Clip” menu and selecting “Groove Pool.”
4. Extracting the Groove
Once the Groove Pool is open, right-click on the prepared reference clip and choose “Extract Groove.” Ableton will analyze the timing and dynamics of the clip, creating a groove template that you can use later.
5. Applying the Groove
With the groove template saved in the Groove Pool, you can now apply it to other audio or MIDI clips in your project. Select the target clip, right-click, and choose “Groove” from the context menu. Then, click on the extracted groove to apply it.

Fine-Tuning the Extracted Groove
After applying the extracted groove to your target clips, you may find the need to make some adjustments to achieve the perfect blend. Here are some useful tips for fine-tuning the groove:
Audio Clip Examples
Plain Drum Track
Groove Extracted added to Drum Track
1. Groove Amount
The “Groove Amount” slider in the Clip View allows you to control the intensity of the applied groove. Experiment with different settings to find the sweet spot that suits your track.
2. Swing and Timing
Ableton Live offers additional controls for swing and timing, enabling you to further modify the groove’s feel. The “Swing” slider adjusts the off-grid timing, while the “Timing” slider shifts the notes’ positions, adding subtle variations to the groove.
3. Humanize
For an even more natural and human-like feel, consider using the “Humanize” function. This feature introduces random variations to the timing and velocity of the notes, making them sound less rigid and more organic.
Conclusion
Groove extraction in Ableton Live is a game-changer for music producers aiming to enhance the rhythm and flow of their tracks. By carefully selecting reference clips and applying them using the Groove Pool, you can infuse your productions with the feel and vibe of professional recordings. Fine-tuning the extracted groove and expanding your groove library will give your music a unique edge that sets it apart from the competition. Now armed with this knowledge, go forth and create groovy masterpieces that will outshine others in the digital realm.
Remember, mastering groove extraction takes practice, so keep experimenting and honing your skills to create captivating music that resonates with your audience. Happy producing!
If you want a deeper lesson on Groove Extraction, check out our course here.